15 November 2013

Thrift Store Refab!! Silky Zippered Top

You know what's really in right now?  Silky tops. You know what's not?  This.

Even Dante hates it.


I found this 80s dream a couple weeks ago for $2.99 and have been hating it ever since I saw it. There's just so much to hate...the shoulder pads, the boxy shape, the sleeves. Need I go on?  I finally figured out how I could fix it, but this monster resisted my efforts at every turn.

First things first, I took out the shoulder pads. I knew I definitely needed to do something awesome to this top, so I decided on putting an industrial type zipper down the back. I folded the shirt in half and cut straight down the back.


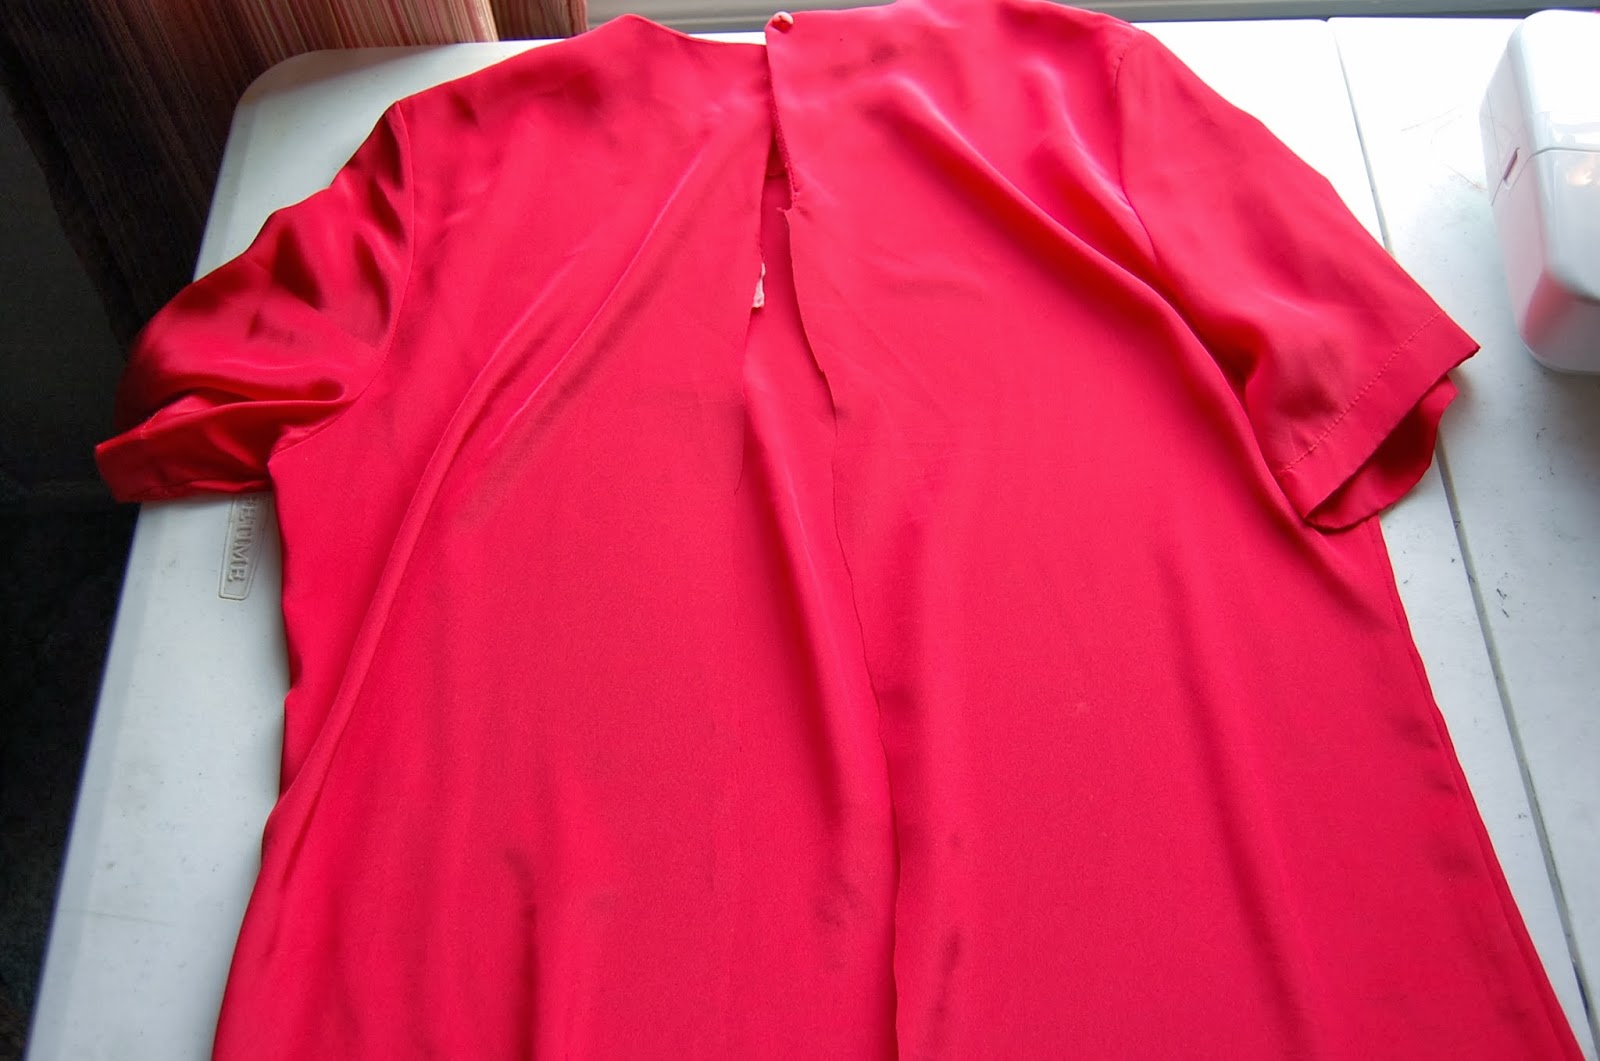
I sewed under the raw edge where I was going to put the zipper.  Then, I pinned the zipper in and sewed it in place. 


Here is where the shirt distinctly said, "I refuse to be tamed!" I could not get the rest of the back seam to sew together correctly. It looked terrible. I ended up having to take out half of the stitching where I had sewed under the raw edge.  Very, very carefully so I didn't damage the fabric. This took forever. I finally got it fixed and the back seam closed. Looking good!


Next, I removed the sleeves so I could adjust the fit. 


I, as usual, put the shirt on inside out and started pinning in the sides. Then, as usual, I sewed the seams. Again, the shirt refused to cooperate because when I attempted to try it on it was way too small. I have no idea why. So again, I had to remove the side seams very carefully and then redo them. Ugh.


I finally got it to fit. Finally. Now for the sleeves. I decided because of the harshness of the zipper, I wanted the sleeves to be a little more feminine to balance it out. I settled on a short cap sleeve. I found another shirt I have with sleeves I liked and used this as a template.  Then, I pinned them in place and sewed them to the shirt.  (I forgot to take a picture of this!)

There was still a little bit of a raw edge so I sewed that down, too. Except the fabric moved a little as I was doing it so I sewed part of it that didn't need sewed. Aaaand I had to remove that stitching very, very carefully. Gah!! 

Eventually, I finished the shirt and tamed this 80s monster. Thank goodness!!


I actually love it now. :-)  Black skinny jeans and some sparkly boots make this perfect for every single upcoming holiday party!  
$2.99 for the shirt, $3.75 for the zipper, and I already had the red thread.  
Total cost: $6.74.

Word.  

22 October 2013

Thrift Store Refab: Mushroom Skirt

On my latest trip to my new favorite thrift store, I saw this hanging on a rack and immediately knew I had to have it. Even if I didn't know what it was. I mean, look at that vintage pattern!!  How could I just leave it there??  Plus, it was 49 cents and 50% off. So, less than a quarter. Seriously. 


Once I got it home, I figured out that it is actually a curtain. I could work with that. After much deliberation, I decided to turn it into a skirt. So I started by removing the curtain rod pocket and hemmed that edge of the fabric to match the other side. 


Next, I folded the fabric in half width wise and cut it to make the front and back. 


I love it already. The fabric is pretty thin so I knew I needed to line this bad boy.  Unless I wanted everyone to see my underwear.  And I do not, so a lining is in order. I had some plain white fabric in my stash. I laid the white fabric out, put my pieces on top, and cut out around them. That way I knew my lining and outer skirt were the same size. 


Next, I put the right sides of the skirt together and sewed the side seams.  Repeat this for the lining, too. 


Now to attach the lining to the skirt.  I started by putting the right sides of the skirt and lining together and then pinned them in place. Then, I sewed them together. Easy!!


Now I needed to figure out how to get it to fit me and close at the top. I thought about a zipper, but we all know how I feel about that. Plus, I didn't want to lose any of this amazing pattern!! Solution?  An elastic waist. Its difficult to see in the picture, but I sewed a pocket at the top to put the elastic in leaving a one inch opening (in order to insert the elastic).  

I used a 3/4" elastic for this. As for how much, I measured my waist where I wanted the skirt to sit and then took that number x .75.  That would provide the stretch I would need. The easiest way for me to put in elastic is to attach a safety pin to one end and then work it through the pocket I made.  Once I got it through, I sewed both ends of the elastic together and closed up the opening.  

It looked good, but I felt like it was still missing something.  I rifled through my stash and found some vintage eyelette edging I got at an auction at least 5 years ago.  I pinned it to the inside bottom edge of the outer skirt and sewed it in place.  Whirrrrrr!!  Now, it was finished!!!


Perfect!!  So, I spent a quarter on the curtain, maybe 10 cents on the edging, and a dollar total for the little scrap of elastic and white fabric I had.  Not too bad!!

Total cost: $1.35


17 October 2013

Thrift Store Refab: Polka Dots

While I was scouring the XL and up rack at my local thrift store, I kept getting weird looks from an 80+ year old woman. She would look at the clothes, then look at me...then look at the rack and then look at me. Finally, she said, "You're not an extra large, are you?" I said, "No."  I should have stopped there, but I didn't. I started to explain to the woman that I find clothes that are too big or weird and, on my blog, do tutorials on how to turn these items into something better. Then, I picked this gem off the rack...


...and said that I would probably turn it into a skirt with the buttons going down the back. The woman just stared at me for a moment and finally said, "So you sew." I said yes. She said, "That's nice" and walked away. I was kind of irritated at first. Then I realized that this woman probably has no idea what a blog is. I must follow through with my plan for this shirt, though, in the event that this woman finds out what a blog is and comes looking for this project. I mean, I pretty much owe it to her.

Time to get to work. I started by chopping off the collar, shoulders, and sleeves.


Then, I sewed the sides closed.


Time to try it on.  Yikes!!  As awesome as this looks, that woman at the thrift store would not approve.


Next, I started pinning the sides until it fit a little better and sewed them together.


I will have to fix the fit a little later. Time for the top. I folded over the raw edge and sewed it in place.


I didn't want to have to put in a zipper (please reference previous posts regarding my hatred of zipper installation). My plan?  Keep the buttons functional. I also knew that having a whole line of functional buttons down the back of a skirt was probably not a good idea (two very real risks: losing a button and having my whole butt exposed, and idiots). I decided having just one or two functional buttons was a better idea. So I sewed from just above the second button to just below the bottom button.

Now to fix the fit. This shirt actually worked out well for this project because of the darts running down the back of the shirt (now the front of my skirt).  These make the skirt flair out a little at the bottom. I put the skirt on inside out and pinned the sides a little more and also added some small darts in the back at the waistband.


Seeeeeeeewww!!

A hook-and-eye closure at the top and a little steam, and bam!


Total cost: $3.49

Word.

10 October 2013

Thrift Store Refab: Sweatshirt Edition

It's Autumn!!  That means crisp nights and walks in the leaves. What could be better than a great sweatshirt??  Anyone who uses Pinterest has probably seen people pinning these DIY sweatshirt pictures (here and here).  I figured I would give it a shot!!  So, I headed to my local thrift store to see what I could find.

Lo and behold, I found this beauty!!  Size XL, and for only $1.74?!?  Yes!!


First things first, let's cut it down to size and make it fit.  I put it on inside out and started pinning the sleeves until they fit.  Once I was done pinning, I sewed them using a zigzag stitch. Why zigzag, you say?  Well, zigzag stitches stretch a little, and that is good to have on a stretchy material. Otherwise, I might bust a seem, and that would not be pleasant. I also cut off the excess sweat-scraps, otherwise my arms wouldn't fit in the sleeves!

Next, I sliced it right down the middle. I could have left it like this, making it a weird sweat-cardigan, but, alas, that was not my long term plan.  Back to work!!

I also had this gem hiding in my stash that I got for $1.50 a couple months ago. I like the stripes so I decided to use the material as an accent.

I cut off the bottom hem, and sewed it to the edge of the opening I just made.

I knew that it was going to take some work getting this thing to fit me. So, I put on my beautiful sweat-cardigan and pulled the edge over pretty far.

I used some chalk to mark where I wanted it, and then sewed it in place.  Weeeee!!

It still didn't quite fit, so I put it on inside out again and started pinning the sides. Sew sew sew!  It finally fit!

This is what I was left with, but I still wasn't happy with it. What to do? What to do?  Aha!! Remember my sleeve sweat-scraps?! I bet they would make an awesome cowl!! 

I sewed the two pieces together, cut it in half length-wise, and sewed on some more of my striped fabric as a lining.

Then, I sewed all of my raw edges under and pinned this bad boy in place. I messed with a few options, but finally decided on doing a cross over in the front. The hardest part of this whole project?  Sewing this damn cowl in place. There were just so many layers of fabric that my sewing machine said to me, "Look, lady, I just can't do it today. I need a break.  It's you, not me." But after a long talk, a few tears, and a cup of tea, we worked things out and powered through.

For the finishing touch, I found two yellow buttons in my stash and slapped them on there.

And here's the final product!!  Seriously, though, you can do this one.


Total cost (with a little extra thrown in there for the buttons and thread in my stash): $3.50.

Word.

07 October 2013

I really "need" another dress.

I looked in my closet the other day and thought to myself, "I really need another dress."  Keep in mind that need is a relative term.  This is what I made...


Now, let me show you how I made it!

First, I found some fabric.  I actually bought this fabric about five years ago, and I have no idea where I got it or why.  But when I saw it in my stash, I knew it would work for this project.


I decided the easiest way to make this dress without a pattern or really knowing anything was to find some items I already have in order to get the shape I wanted.  I used this black BCBG dress for the bodice shape, and this polka dot skirt from Forever 21 for the shape and length of the bottom.  Just lay them on there, and trace around them, leaving a little extra for a seam allowance!


Cut, cut, cut!


After cutting out the pieces, I pinned them together to see how the dress was going to fit.  Here's where I messed up...I didn't leave enough extra room for a seam allowance, so there was no way the dress was going to fit me (apparently I am wider than I thought!).  I problem solved my way out of this one by cutting some extra fabric and sewing it onto both sides of the front piece, like this!

Problem solved!

This added a little bit more width to dress so I could get it over my butt, and it added a neat design element.  Don't worry, you'll see in the end.  Next, I sewed the front and back together, and then I got started on the opening for the zipper and the vent in the back (so I can walk!).  

I hate putting in zippers.  Very much.  But there was no way I would be able to get this dress on without one.  I tried to follow the directions on the package, but it seemed more complicated than it needed to be.  
 
"Iron the zipper?"  Why?!?

I gave up on the directions and just sewed the zipper to my opening fully expecting I was going to have to either rip it off of there or just throw the whole dress away.  Surprisingly, it turned out great!  In order to get the dress to fit me right, I had to add in some significant darts in the front and back.  I also realized that the top of the dress was a little see-through, so I decided to use some of the extra fabric to line the top of the dress.  Like this!


I added some edging at the top since it looked a little blah.  I paired it with some "pearls" (every woman should own a set of pearls...just don't tell anyone that mine aren't real and I got them at a garage sale for 75 cents!), and voila!  


Boom!!